

RV Winterizing Tools

VIAIR 450P-RV Automatic Portable Air Compressor Kit – 150 PSI for RV, Truck, Jeep and SUV Tires – RV Accessories with 1.80 CFM, Silver
VIAIR 450P-RV Automatic Portable Air Compressor Kit – 150 PSI for RV,…

VIAIR 400P-RV – 40047 Tire Inflator Portable Air Compressor with RV Inflation Gun, 90 Degree Chuck | 12V Tire Pump Air Compressor Portable Heavy Duty 150 PSI, up to Class C Tires, Alligator Clips
VIAIR 400P-RV – 40047 Tire Inflator Portable Air Compressor with RV Inflation…
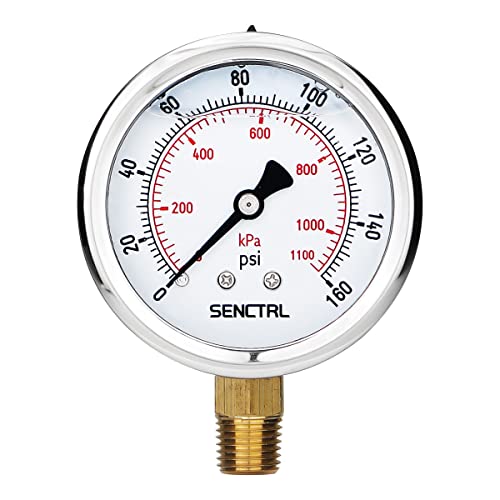
SENCTRL 0-160 Psi Glycerin Liquid Filled Air Pressure Gauge, 2.5" Dial Size, 1/4" NPT Lower Mount, Stainless Steel Case, Water Pump, Tire, Large Air Compressor, Well Pump, RV Regulator Pressure Test
SENCTRL 0-160 Psi Glycerin Liquid Filled Air Pressure Gauge, 2.5" Dial Size,…
Essential Guide to RV Winterizing: Blow Out Your Water Lines with Compressed Air

Proper RV winterizing is a crucial maintenance task for any recreational vehicle owner. Among the most effective winterizing methods is blowing out the water lines with compressed air to remove residual water from your plumbing system. This comprehensive guide will walk you through the process of using an air compressor to blow out your RV’s water lines, helping you prevent costly freeze damage and ensuring your mobile home remains in pristine condition throughout the colder months.
Why is Blowing Out RV Water Lines Important for Winterizing?
Winterizing your RV is not just a recommended practice—it’s absolutely essential for protecting your investment. Water left in your plumbing system can freeze when temperatures drop below freezing, expanding and potentially causing severe damage to your water lines, water pump, faucets, and other vital components. This damage can lead to expensive repairs and might even render your RV unusable until fixed.
By properly draining the water and blowing out the lines with compressed air, you effectively remove residual water that could otherwise freeze and crack your plumbing system.
What happens if you don’t properly winterize your RV?
Failing to winterize your RV can lead to catastrophic consequences. When water freezes inside your fresh water tank, water lines, or water heater, it expands by approximately 9%, creating tremendous pressure within these confined spaces.
This expansion can crack water tanks, split water lines, damage water valves, rupture your water pump, and even destroy your water heater. The resulting damage isn’t just inconvenient—it can be extremely costly to repair, potentially running into thousands of dollars.
Beyond the financial impact, water damage can create perfect conditions for mold growth in your RV’s interior, leading to additional health concerns and restoration expenses. Furthermore, discovering these issues when you’re preparing for your first spring trip can abruptly end your vacation plans before they even begin.
How does the blow out method compare to using antifreeze?
When it comes to winterizing methods, RV owners typically choose between two primary approaches: the blow out method using compressed air or filling the plumbing system with RV-specific antifreeze. The blow out method involves using an air compressor to force air through your water lines, pushing out residual water.
This method is clean, efficient, and doesn’t introduce any chemicals into your water system. On the other hand, using antifreeze involves pumping a non-toxic propylene glycol solution throughout your plumbing system to prevent freezing. While both methods are effective, many RV enthusiasts prefer the blow out method because it doesn’t leave any antifreeze taste in the water system and requires less flushing in spring.
However, the blow out method may not reach every water trap or low point in complex plumbing systems. For optimal protection, many experienced RV owners combine both approaches—first blowing out the water lines with compressed air, then adding minimal antifreeze to P-traps and other areas where water might remain.
When should you start winterizing your RV water lines?

Timing is critical when it comes to winterizing your RV. As a general rule, you should winterize your RV before the first freeze of the season occurs in your area. For most regions in North America, this means starting the winterizing process in late autumn, typically between mid-October and mid-November.
However, if you live in or are traveling through higher elevations or northern states, you might need to winterize earlier. The key factor is not the calendar date but the temperature forecast—any prediction of temperatures approaching 32°F (0°C) should trigger your winterizing preparations.
It’s always better to winterize your RV too early rather than too late, as a single night of unexpected freezing temperatures can cause significant damage to your water system.
If you’re still actively using your RV during the colder months, you’ll need to develop a strategy for winterizing between trips or consider alternative heating methods to protect your plumbing system during freezes.
What Equipment Do You Need to Drain the Water and Blow Out RV Lines?
Having the right equipment is essential for effectively blowing out your RV water lines. The process requires specific tools designed to safely apply compressed air to your plumbing system without causing damage.
From selecting the appropriate air compressor to finding the right adapters and fittings, each piece of equipment plays a crucial role in ensuring a thorough winterization. Investing in quality tools now will not only make the winterizing process more efficient but will also protect your RV from potentially costly freeze damage.
How to choose the right air compressor for RV winterizing

Selecting the appropriate air compressor is perhaps the most important equipment decision for blowing out RV water lines. The ideal air compressor should deliver sufficient air pressure while allowing you precise control to avoid damaging your plumbing system.
Most experts recommend using a compressor capable of delivering between 30-40 PSI, which is enough air pressure to push water out of the lines without risking damage to your RV’s plumbing components. Small portable compressors that deliver 3-4 cubic feet per minute (CFM) are typically sufficient for most RVs.
Larger units offer the advantage of more consistent air pressure throughout the process, but they’re often more expensive and less portable. When choosing an air compressor, look for models with built-in pressure regulators that allow you to adjust and maintain the appropriate PSI level.
If your compressor lacks this feature, consider purchasing a separate inline pressure regulator to protect your water lines from excessive air pressure. Remember that higher isn’t better when it comes to PSI—too much pressure can damage water pumps, fittings, and connections in your plumbing system.
What blowout adapters or fittings will you need?
To effectively connect your air compressor to your RV’s water system, you’ll need specialized adapters and fittings. The most essential item is a blowout plug (sometimes called an air compressor adapter), which connects to your RV’s city water inlet.
This specialized fitting typically has a standard male garden hose thread on one end that screws into your RV’s city water connection, and a quick-connect fitting or standard air compressor fitting on the other end that attaches to your air hose. Some RV owners also find a water pressure regulator helpful during this process, as it provides additional protection against pressure spikes.
You may also need various hose adapters, especially if your air compressor uses fittings that aren’t compatible with your blowout plug. For thorough winterization, consider having a collection of different sized wrenches and pliers to access water heater drain plugs and other potentially tight connections. Finally, don’t forget to have several clean towels on hand to catch any water that may spray out when you’re blowing out the lines and to clean up any spills during the process.
Essential tools for accessing low point drains
Accessing and properly draining the low point drains in your RV’s plumbing system is a critical step in the winterizing process. These low point drains are strategically positioned at the lowest sections of your fresh water system to allow complete drainage of water lines. To effectively access and operate these drains, you’ll need several specialized tools.
First, a flashlight or headlamp is essential as many low point drains are located in dimly lit, hard-to-reach areas underneath your RV. Second, you’ll want to have adjustable wrenches or pliers to help open stubborn drain valves that may have become tight over time. A water heater tank rinser, which is essentially a bent wand that can be inserted into the water heater after removing the drain plug, helps dislodge sediment that might prevent complete draining.
In some RVs, low point drains might be recessed or positioned in tight spaces, so a drain valve extension tool can be invaluable for reaching these difficult areas. Additionally, having a collection pan or bucket is important for catching water when you open the low point drains, helping to keep the process clean and allowing you to dispose of the water properly.
For RVs with particularly complex plumbing systems, a mirror on an extendable handle can help you visually inspect areas to ensure all drain valves have been located and opened.
Step-by-Step Guide to Blowing Out the Water Lines with Air
The process of blowing out RV water lines with compressed air follows a logical sequence that ensures all water is removed from your plumbing system. Following this step-by-step approach will help you thoroughly winterize your RV, protecting it from freeze damage during the colder months.
This systematic method addresses each component of your water system, from the fresh water tank to individual faucets and fixtures, ensuring no water remains to freeze and cause damage.
How to prepare your RV water system before using compressed air
Proper preparation is essential before introducing compressed air into your RV’s water system. Begin by turning off your RV water heater and allowing it to cool completely—never drain a hot water heater as the escaping hot water can cause serious burns. Once cooled, disconnect your RV from any external water sources such as city water connections or campground hookups. Next, drain your fresh water tank completely by opening the fresh water tank drain valve.
After emptying the fresh water tank, locate and open all low point drains in your plumbing system—most RVs have separate low point drains for hot and cold water lines.
Remove any inline water filters from your system, as these can be damaged during the blowout process and may trap water that could later freeze. If your RV has a water pump filter, this should also be removed and emptied. Turn on your water pump briefly to help push water out of the lines, but be sure to turn it off before it runs dry to prevent damage.
Open all faucets in the RV, including kitchen, bathroom, shower, and outside shower connections, to allow air to flow through the system. Don’t forget to flush the toilet several times to remove water from its valve system.
Finally, if your RV has a water heater bypass system, now is the time to set it to the bypass position to prevent air from entering the water heater tank during the blowout process.
What is the proper PSI for blowing out RV water lines?
Maintaining the correct air pressure is crucial when blowing out RV water lines to effectively remove water without damaging your plumbing system. The industry standard recommendation is to use between 30-40 PSI (pounds per square inch) of air pressure during the blowout process.
This range provides sufficient force to push water through the lines while staying well below the pressure threshold that could damage fittings, connections, or the water pump. It’s important to understand that RV plumbing systems are typically designed to handle water pressures between 40-60 PSI, but air behaves differently than water in the plumbing system.
Air can compress and expand more readily than water, potentially creating pressure spikes that could damage components if set too high.
Never exceed 40 PSI when blowing out water lines, as higher pressures can rupture pipe fittings, damage the water pump, or even separate pipe connections within walls where repairs would be extremely difficult. If your air compressor doesn’t have a built-in regulator, invest in an inline air pressure regulator that can be attached between your compressor and the blowout plug.
Additionally, most compressors build pressure over time, so you’ll need to monitor the gauge throughout the process to ensure pressure remains in the safe zone. For RVs with older plumbing systems or known weak points, consider reducing the pressure to 25-30 PSI as an added precaution.
Techniques for ensuring all water is removed from the plumbing system
Thorough water removal is the goal of blowing out your RV water lines, and several techniques can help ensure no residual water remains in your plumbing system.
After connecting your air compressor to the city water inlet using a blowout plug, start by opening the faucet furthest from the connection point, typically the kitchen or bathroom sink. With the compressor running at 30-40 PSI, you’ll see water sputtering from the open faucet, eventually giving way to just air.
Work systematically through each fixture in your RV, keeping faucets open until only air emerges, then closing them before moving to the next. Remember to toggle faucets between hot and cold settings to clear both lines.
For shower fixtures with diverters, cycle through all positions to ensure all pathways are cleared. Don’t neglect external fixtures like outside showers or utility showers which often trap water. To address toilet systems, hold the flush pedal down partway to allow air to blow through the valve without closing it. For optimal results, repeat the entire blowing process 2-3 times, as water can sometimes be pushed from one section of plumbing to another during the first pass.
Between blowout attempts, turn on the water pump briefly to help move any relocated water toward drain points. After completing the air blowout process, open all faucets and leave them in the half-open position (between hot and cold) to prevent pressure buildup in the lines and allow any remaining moisture to evaporate.
This comprehensive approach helps ensure that virtually all water is removed from your plumbing system, providing maximum protection against freeze damage.
Winterizing Your RV Water Heater: Special Considerations
Your RV water heater requires special attention during the winterizing process. As one of the most expensive components in your plumbing system, proper winterization of the water heater is essential to prevent costly damage.
The water heater contains a significant volume of water that must be completely drained and its internal components need protection from freezing temperatures. Understanding how to properly address the water heater during winterization will help ensure this valuable component remains in good working order for years to come.
Should you use the water heater bypass when blowing out lines?
The water heater bypass is a crucial component when winterizing your RV, particularly when using the blow out method.
Most modern RVs come equipped with a bypass system consisting of one to three valves that, when properly positioned, prevent water or air from entering the water heater tank while still allowing you to blow out the water lines. Using the water heater bypass during the blowout process offers several significant advantages.
First, it prevents you from wasting compressed air trying to fill the large volume of the hot water tank, which typically holds 6-10 gallons. Without the bypass engaged, your air compressor would need to maintain pressure throughout this large tank, reducing its effectiveness in clearing water from the lines. Additionally, using the bypass helps focus the air pressure where it’s needed most—in the actual water lines rather than the tank (which you’ll drain separately). The bypass also prevents air from potentially damaging sensitive components inside the water heater such as the anode rod or heating elements. To properly engage the water heater bypass, locate the bypass valve(s) usually positioned near the water heater.
In a one-valve system, turn the valve perpendicular to the line to engage the bypass. In three-valve systems, close the inlet and outlet valves and open the middle bypass valve. If you’re unsure about your specific configuration, consult your RV owner’s manual or look for a diagram often attached inside the water heater access panel.
How to properly drain and blow out the hot water heater
Draining and blowing out your RV’s hot water heater requires careful attention to specific steps to ensure complete water removal and protection from freezing. Begin by turning off the water heater and allowing it to cool completely—attempting to drain a hot water heater can result in serious burns and potential damage to components.
Once cooled, relieve the pressure in the system by opening a hot water faucet in your RV. Locate the water heater’s external access panel (typically on the outside of your RV) and remove it to access the drain plug and anode rod. Before removing the drain plug, ensure you have a container positioned underneath to catch the draining water.
Using the appropriate wrench, carefully remove the drain plug or anode rod, allowing the water to flow out completely. While the water is draining, locate and remove the pressure relief valve to allow air into the tank, facilitating faster and more complete drainage. Once the tank appears empty, use your air compressor at a reduced pressure (about 15-20 PSI) to blow air directly into the tank through the drain opening to remove any remaining water droplets.
This is especially important for removing water from recessed areas inside the tank. After blowing out any residual water, you can either replace the drain plug loosely (to allow for expansion if any moisture freezes) or leave it out entirely for the winter with a reminder note in your RV to reinstall it before spring use.
Some RV owners place the drain plug in a small plastic bag and attach it to the water heater control panel to ensure it’s not lost. Remember that properly draining the hot water tank is just as important as blowing out the water lines, as a cracked tank due to freezing can cost several hundred dollars to replace.
Common water heater valve issues during winterizing
Water heater valve problems are among the most frequent challenges RV owners encounter during the winter.
What an excellent resource for RV enthusiasts! The article not only highlights the significance of winterizing but also walks us through the intricacies of the process. I particularly appreciated the section on selecting the right air compressor, which can be a daunting task without proper guidance. This guide is now bookmarked for future reference—thank you for making RV maintenance more approachable!
Reading through this guide was a delight! The clarity with which complex topics, like water heater bypass systems and low point drains, are explained is truly commendable. It’s evident that a lot of expertise and thought went into crafting such a thorough piece. This will certainly help many RV owners prepare for winter confidently. Looking forward to more articles like this!
This article provides a well-written and comprehensive guide on winterizing an RV, especially focusing on the importance of blowing out water lines. The detailed step-by-step instructions and equipment recommendations are incredibly helpful for both new and seasoned RV owners. It’s reassuring to know that with proper preparation, costly damages can be avoided and the RV can remain in great condition. Kudos for emphasizing the importance of this process!